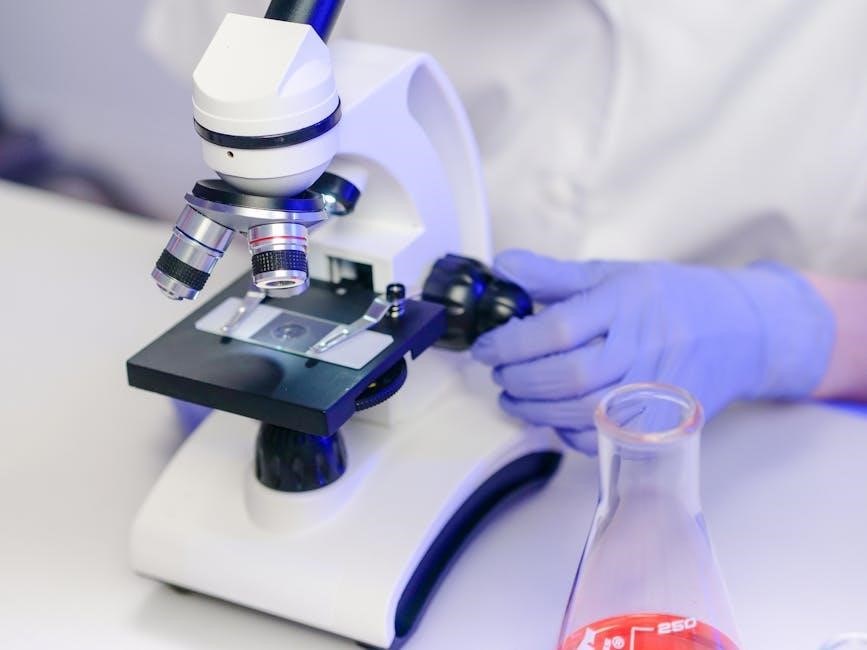
Microscopes are essential tools, directing light and supporting slides for detailed observation of tiny structures. Various models exist,
each with unique components and functions, aiding scientific exploration and discovery.
Understanding these instruments involves recognizing how they magnify specimens, and their parts are crucial for clear, focused views.
What is a Microscope?
A microscope is an instrument used to view objects that are too small to be seen by the naked eye. It achieves this by magnifying the image of the specimen, revealing intricate details otherwise invisible. From basic biological studies to advanced material science, microscopes are fundamental tools across numerous disciplines.
Essentially, a microscope directs light through a specimen, utilizing a series of lenses to enlarge the image. These lenses, along with supporting components like the stage and focusing knobs, work in harmony to produce a clear and magnified view. Different types of microscopes exist, each employing unique techniques to achieve magnification and resolution.
The ability to study microscopic structures is vital for understanding the building blocks of life, diagnosing diseases, and advancing scientific knowledge. A clear understanding of the instrument’s parts and their functions is paramount for effective use and accurate observation.
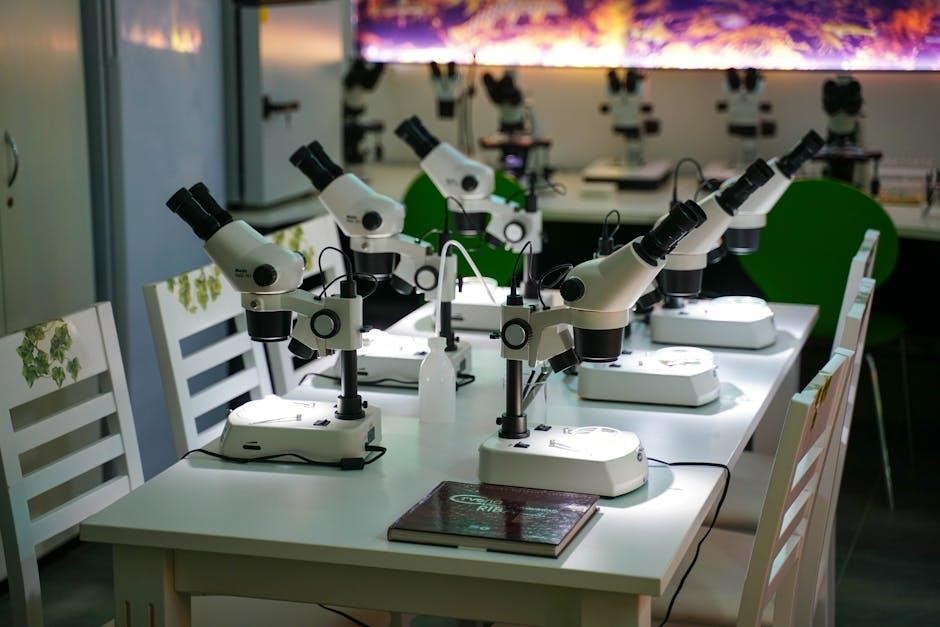
Types of Microscopes (Brief Overview)
While the compound microscope is commonly used, several other types cater to specific needs. Stereo microscopes provide a 3D image, ideal for dissecting and surface examination, often featuring adjustable lighting for optimal viewing.
Electron microscopes, utilizing beams of electrons instead of light, offer significantly higher magnification and resolution, revealing details at the nanometer scale. These are crucial in fields like virology and materials science.
Other specialized types include phase-contrast microscopes, enhancing contrast in transparent specimens, and fluorescence microscopes, used to visualize specific structures labeled with fluorescent dyes. Each type employs different principles to magnify and illuminate specimens.
Understanding the strengths of each microscope type is essential for selecting the appropriate tool for a given application, ensuring accurate and detailed observations. The core principle, however, remains the same: to expand our view of the microscopic world.
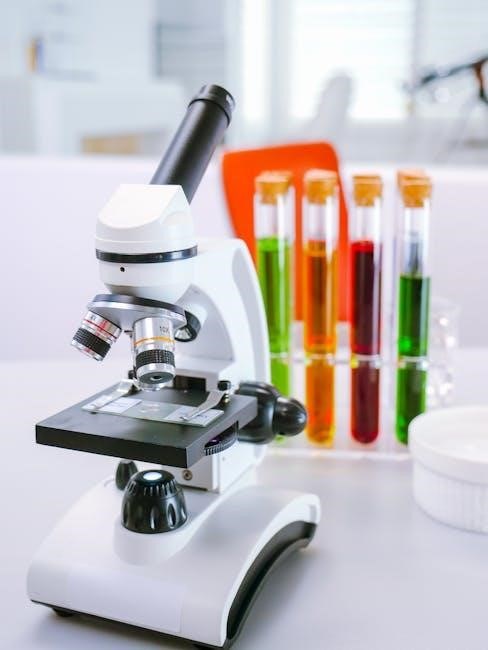
The Compound Microscope: A Detailed Look
Compound microscopes utilize multiple lenses to achieve high magnification, revealing intricate details of specimens. They are fundamental tools in biology and medicine.
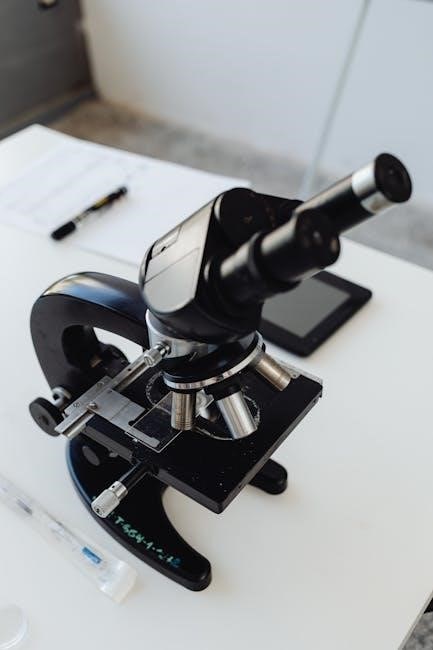
Overall Structure and Components
A compound microscope’s structure comprises several key components working in harmony. The base provides stable support, while the arm facilitates carrying and overall support of the microscope body. Above the base is the stage, a platform holding the specimen secured by stage clips.
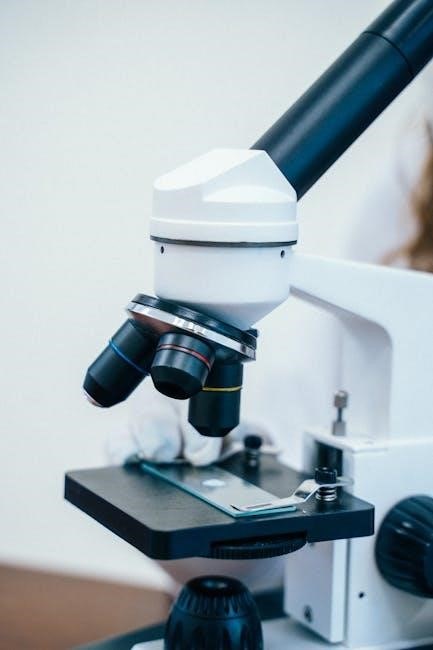
The optical system, crucial for magnification, includes the eyepiece (ocular lens) for initial magnification and objective lenses providing primary magnification. A revolving nosepiece allows easy switching between these objectives. Illumination is provided by a light source, focused by the condenser, with intensity controlled by the iris diaphragm.
Focusing knobs – coarse and fine – enable sharp image acquisition. These components, when understood, allow for effective specimen examination and detailed observation.
Importance of Understanding Microscope Parts
Comprehending each microscope part and its function is paramount for successful observation. Knowing how the light source and condenser interact directly impacts image clarity and visibility of specimen details. Proper use of objective lenses – 4x, 10x, 40x, and 100x – requires understanding magnification power and appropriate application.
Mastering the focusing knobs (coarse and fine) is essential for achieving sharp, detailed images. Familiarity with the stage and its controls allows for precise specimen manipulation. Understanding parfocal and parcenteric objectives streamlines observation during magnification changes.
Ultimately, a thorough grasp of these components empowers researchers and students to effectively utilize the microscope, leading to accurate analysis and meaningful scientific discoveries.
Base and Support System
The base provides crucial stability, while the arm facilitates safe carrying and reliable support during microscope operation and observation of specimens.
The Base: Providing Stability
The microscope base is the foundational support structure, critically ensuring the instrument’s stability during use. It’s typically a horseshoe-shaped or rectangular component, designed with weight and a broad surface area to prevent tipping. This robust construction minimizes vibrations and maintains a steady platform for precise observations.
A stable base is paramount for obtaining clear, undistorted images, especially at higher magnifications where even slight movements can significantly impact the view. The base often incorporates rubber feet to further enhance stability and protect the working surface. It houses the illumination system and sometimes includes controls for power and light intensity. Essentially, the base is the anchor that allows all other components to function effectively, providing a secure foundation for microscopic exploration.
The Arm: Carrying and Support
The arm serves as the primary structural support connecting the base to the head (containing the optical components) of the microscope. It’s designed for comfortable and safe transport of the instrument. Microscopes should always be carried with one hand firmly grasping the arm and the other supporting the base, preventing strain on delicate parts.
Beyond transportation, the arm provides crucial stability during observation. It’s a rigid component that minimizes wobble and ensures the microscope remains securely positioned. The arm often houses mechanisms for adjusting the height of the stage or rotating the microscope head. Its ergonomic design facilitates easy manipulation and positioning, allowing researchers to comfortably examine specimens for extended periods. A well-constructed arm is vital for both the longevity and usability of the microscope.

Optical Components: Magnification System
Optical components, including the eyepiece and objective lenses, work together to magnify specimens. They precisely direct light,
creating a clear and detailed image for observation.
Eyepiece (Ocular Lens): Initial Magnification
The eyepiece, also known as the ocular lens, is the part you look through to observe the specimen. It plays a crucial role in initial magnification, typically ranging from 10x. This means it magnifies the image created by the objective lens ten times its actual size.
Different eyepieces offer varying levels of magnification, allowing for flexibility in observation. Some microscopes feature adjustable eyepieces to accommodate individual eyesight differences, ensuring a sharp and comfortable viewing experience. The eyepiece essentially projects a magnified virtual image of the specimen to the observer’s eye.
Quality eyepieces are vital for achieving high-resolution images, minimizing distortion and maximizing clarity. They are often paired with objective lenses to achieve the desired total magnification. Proper care, including regular cleaning, is essential to maintain optimal performance.
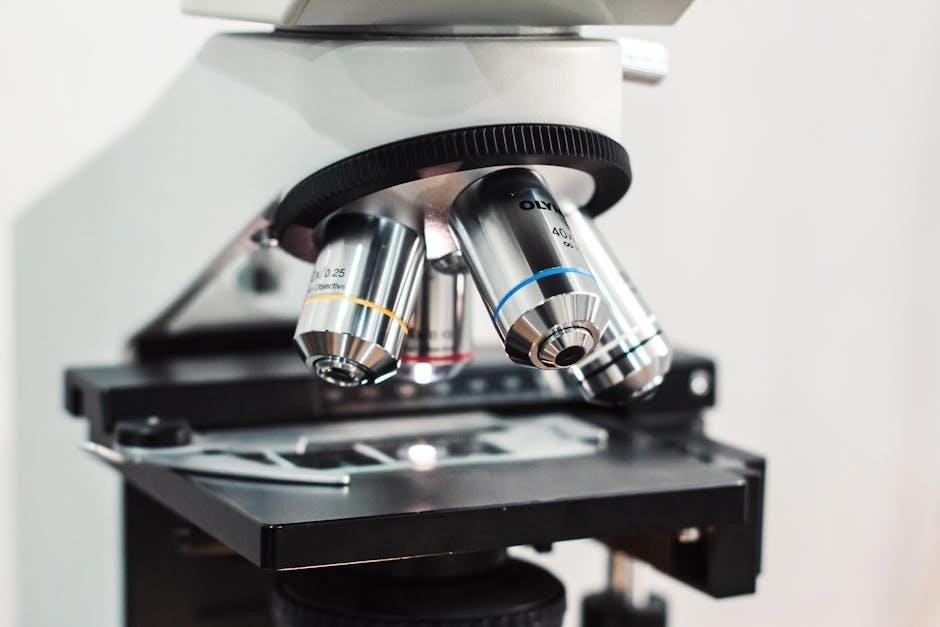
Objective Lenses: Primary Magnification
Objective lenses are the primary lenses responsible for magnifying the specimen. Typically, a compound microscope features multiple objective lenses mounted on a revolving nosepiece, offering a range of magnification powers. Common magnifications include 4x, 10x, 40x, and 100x, each providing a different level of detail.
The objective lens gathers light from the specimen and creates a real, magnified image. The quality of the objective lens significantly impacts the resolution and clarity of the observed image. Higher magnification objectives generally require stronger illumination to produce a bright and clear image.
These lenses are carefully designed to minimize aberrations and provide accurate representation of the specimen’s structure. The 100x objective often requires immersion oil to enhance resolution and light gathering capabilities.
Different Objective Lens Powers (4x, 10x, 40x, 100x)
Objective lenses offer varying magnification levels, starting with the 4x lens for a low-power, wide field of view – ideal for initial specimen overview. The 10x lens provides a moderate magnification, suitable for observing larger cellular structures. Moving to the 40x lens significantly increases magnification, revealing finer details within cells and tissues.
The 100x objective, often used with immersion oil, delivers the highest magnification, enabling visualization of extremely small structures like bacteria. Each power requires adjustments to illumination and focusing for optimal clarity. Lower powers offer greater depth of field, while higher powers provide increased resolution.
Selecting the appropriate objective lens depends on the specimen and the desired level of detail. Proper use of each lens is crucial for accurate observation and analysis.
Parfocal and Parcenteric Objectives
Parfocal objectives maintain focus when switching between different magnification powers. This means that once a specimen is in focus with one objective, minimal refocusing is needed when changing to another, streamlining observation. This feature significantly speeds up the viewing process and reduces eye strain.
Parcentric objectives remain centered in the field of view during magnification changes. This ensures that the area of the specimen being observed stays in the center, even as you increase magnification. Both parfocal and parcentric qualities are essential for efficient and accurate microscopic work.
These features are standard in modern compound microscopes, contributing to ease of use and reliable results during specimen analysis.
Illumination System
Microscope illumination provides the necessary light for viewing specimens. Key components include the light source, condenser, and iris diaphragm, working together for optimal visibility.
Light Source: Providing Visibility
The light source is fundamental to microscope functionality, illuminating the specimen to enable observation. Historically, microscopes utilized mirrors to reflect natural light, but modern instruments predominantly employ built-in electric lamps. These lamps can vary, including halogen, LED, and even mercury or xenon arc lamps for specialized applications like fluorescence microscopy.
The intensity of the light source is a critical factor; too little light results in a dim, unclear image, while excessive light can wash out details and damage the specimen or the observer’s eyes. Many microscopes feature a rheostat or dimmer control to adjust the light intensity precisely. Modern LED light sources are favored for their energy efficiency, long lifespan, and consistent light output. Proper functioning of the light source is paramount for achieving a clear and detailed microscopic image.
Condenser: Focusing Light on the Specimen
The condenser is positioned beneath the stage and plays a vital role in concentrating and directing light onto the specimen. It consists of a system of lenses that gather light from the illumination source and focuses it into a tight, even beam. This focused illumination enhances resolution and contrast, revealing finer details within the sample.
Condensers are typically adjustable in height, allowing users to optimize the light path for different objective lens magnifications and specimen thicknesses. Proper condenser alignment is crucial; misalignment can lead to uneven illumination and reduced image quality. The condenser also often includes an aperture diaphragm, working in conjunction with the iris diaphragm to control light intensity and contrast further. Effective use of the condenser is essential for maximizing the microscope’s optical performance.
Iris Diaphragm: Controlling Light Intensity
The iris diaphragm, located within the condenser, is a crucial component for regulating the amount of light reaching the specimen. It functions much like the iris of the human eye, utilizing a series of overlapping blades to adjust the diameter of the aperture through which light passes.
Controlling light intensity is paramount for achieving optimal image contrast and resolution. Closing the diaphragm increases contrast, ideal for transparent specimens, but can reduce resolution. Opening it increases brightness and resolution, suitable for darker samples. Careful adjustment balances these factors. The iris diaphragm also minimizes glare and enhances the visibility of subtle details. Mastering its use is fundamental to effective microscopy, allowing for tailored illumination based on specimen characteristics and objective lens magnification.
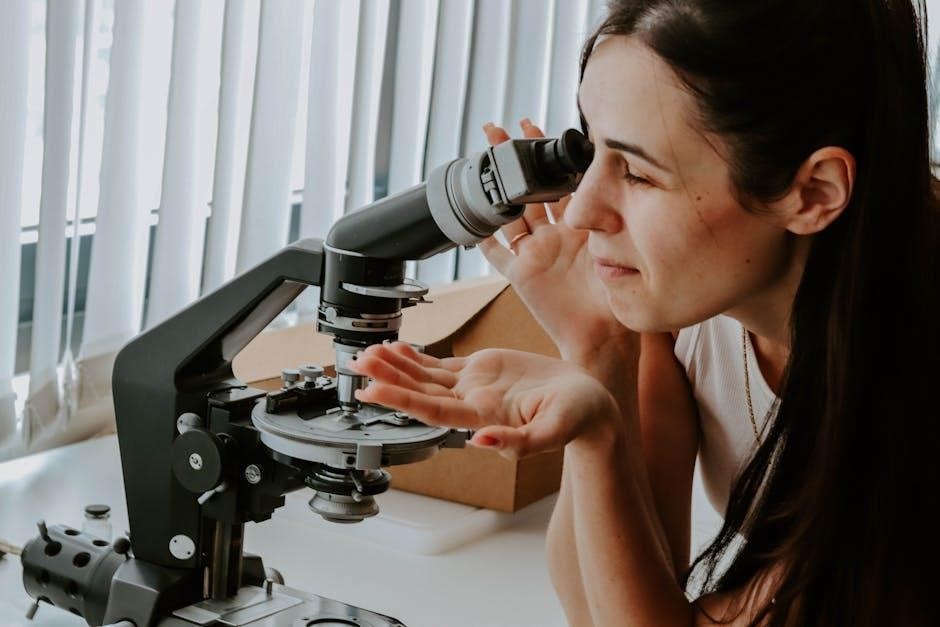
Stage and Specimen Handling
The stage securely holds slides for observation, utilizing clips or a mechanical stage for precise movement.
These features ensure stable specimen positioning during microscopic examination.
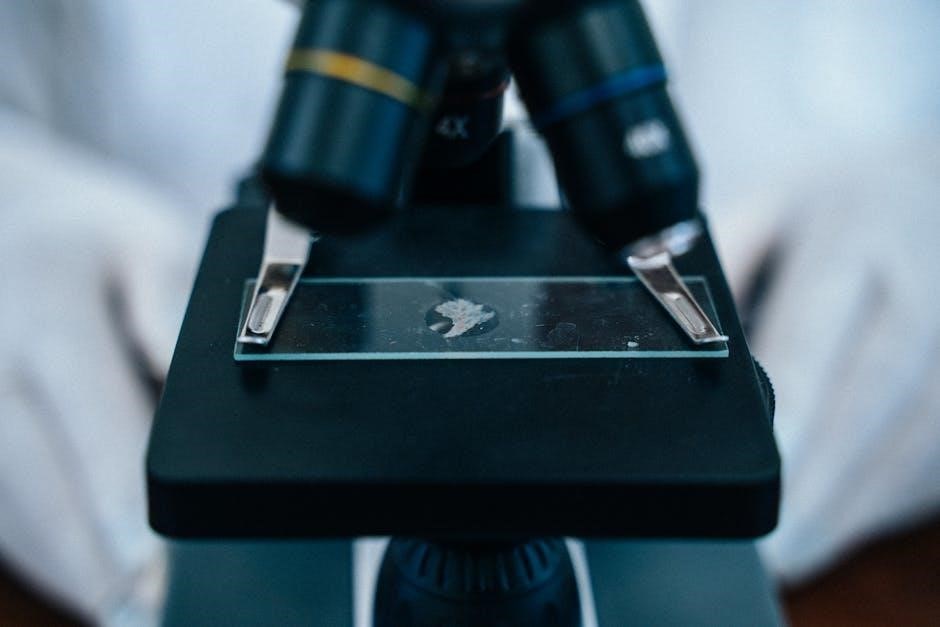
Stage: Platform for the Slide
The microscope stage is the flat platform where you place the slide containing the specimen you wish to view. It’s a fundamental component for stable observation and precise manipulation. Stages come in various designs, but their primary function remains consistent: to securely support the slide during examination.
Many stages are equipped with stage clips, which are metal or plastic fasteners that hold the slide in place. However, more advanced microscopes feature a mechanical stage. This allows for smooth and controlled movement of the slide in both horizontal (X-axis) and vertical (Y-axis) directions.
The mechanical stage is operated using stage knobs, enabling precise positioning of the specimen within the field of view. This is particularly useful for examining larger samples or specific areas of interest. Some stages also incorporate a scale for measuring the distance moved, aiding in accurate observation and documentation. The stage plate, often found on stereo microscopes, provides a surface for specimen placement.
Stage Clips: Securing the Slide
Stage clips are essential components found on most microscope stages, serving the crucial function of securely holding the microscope slide in a fixed position. Typically constructed from metal, these clips are designed to grip the slide’s edges, preventing unwanted movement during observation. This stability is paramount for obtaining clear and focused images.
While simple in design, stage clips are vital for maintaining the specimen’s alignment within the light path. They counteract vibrations and accidental nudges that could disrupt the viewing process. However, it’s important to note that excessive force when securing a slide with clips can cause damage to both the slide and the microscope.
More advanced microscopes often utilize a mechanical stage instead of, or in addition to, stage clips, offering greater control over slide positioning. Nevertheless, stage clips remain a common and reliable method for slide stabilization, particularly in educational settings.
Mechanical Stage Knobs: Precise Movement
Mechanical stage knobs offer a significant upgrade in slide manipulation compared to simple stage clips. These knobs, typically located beneath the microscope stage, allow for smooth and controlled movement of the slide in both horizontal (X-axis) and vertical (Y-axis) directions. This precise control is invaluable for systematically examining different areas of a specimen.
The X-axis knob facilitates left-to-right movement, while the Y-axis knob controls forward and backward positioning. This coordinated movement enables users to scan the entire slide without physically touching it, preventing contamination and ensuring consistent observation. Fine adjustments are also often incorporated for detailed focusing and alignment.
Mechanical stages are particularly beneficial when performing detailed measurements or when tracking specific features across a large sample. They represent a key feature in higher-end microscopes, enhancing both accuracy and ease of use.

Focusing Mechanisms
Focusing knobs are vital for achieving a clear image; coarse focus provides initial adjustments, while fine focus delivers precise clarity for detailed specimen observation.
Coarse Focus Knob: Initial Focusing
The coarse focus knob is the larger of the two focusing knobs, and it plays a critical role in the initial stages of bringing a specimen into focus. Its primary function is to make significant adjustments to the distance between the objective lens and the specimen.
When starting to observe a slide, especially at lower magnifications (like 4x or 10x), the coarse focus knob is used to rapidly move the stage up or down; This allows you to quickly locate the specimen and get a general, albeit blurry, image. It’s essential to use this knob cautiously, particularly at higher magnifications, as rapid movements can easily move the specimen past the focal point or even damage the objective lens or slide.
Typically, the coarse focus is used first to establish a rough focus, and then the fine focus knob is employed for precise adjustments to achieve a sharp, detailed image. Mastering the use of the coarse focus is fundamental to efficient microscope operation.
Fine Focus Knob: Precise Focusing
The fine focus knob is the smaller of the two focusing knobs and is crucial for achieving sharp, clear images under the microscope. Unlike the coarse focus knob, which makes large adjustments, the fine focus knob allows for very small, incremental movements of the stage.
After using the coarse focus knob to obtain a preliminary focus, the fine focus knob is used to refine the image and bring it into perfect clarity. This is particularly important at higher magnifications (40x, 100x) where even slight adjustments can significantly impact image quality. It allows for subtle changes to compensate for slight variations in slide thickness or lens imperfections.
Careful manipulation of the fine focus knob is essential for observing intricate details within the specimen. It’s the key to resolving fine structures and obtaining a well-defined, high-resolution image.
Advanced Features & Components
Revolving nosepieces switch objectives, while depth of field and resolution impact image clarity. Numerical aperture (NA) significantly influences the microscope’s resolving power.
Revolving Nosepiece: Switching Objectives
The revolving nosepiece, also known as the turret, is a crucial component situated beneath the objective lenses on a compound microscope. Its primary function is to allow for the easy and rapid switching between different objective lenses, each providing a unique level of magnification.
Typically, a standard microscope features four objective lenses – 4x, 10x, 40x, and 100x – offering increasing magnification power. Rotating the nosepiece aligns the desired objective lens with the light path, enabling the user to quickly change magnification without physically handling the lenses themselves.
This feature is essential for observing specimens at varying levels of detail, starting with low magnification for initial overview and progressing to higher magnifications for closer examination of specific structures. The nosepiece is designed to be robust and precise, ensuring accurate alignment and minimizing parallax error during objective changes.
Depth of Field and Resolution
Depth of field refers to the thickness of the specimen that appears in focus at any given time. Lower magnification objectives (like 4x) have a greater depth of field, meaning more of the sample is simultaneously in focus, but with less detail. Conversely, higher magnification (100x) reduces the depth of field, requiring more frequent refocusing, but revealing finer details.
Resolution, however, describes the ability to distinguish between two closely spaced points. Higher resolution means sharper, clearer images, allowing for the observation of smaller structures. Resolution is heavily influenced by the quality of the lenses and the wavelength of light used.
These two concepts are inversely related; increasing magnification doesn’t automatically improve resolution. Optimal microscopy involves balancing magnification with sufficient resolution and depth of field to obtain a clear and informative image of the specimen.
Numerical Aperture (NA) and its Significance
Numerical Aperture (NA) is a crucial property of an objective lens, indicating its ability to gather light and resolve fine specimen detail. It’s determined by the lens’s refractive index and the angle of light it can capture. A higher NA value signifies greater light-gathering ability and improved resolution.
Essentially, NA dictates the resolving power of the microscope. Objectives with higher NAs (e.g., 1.25 for a 100x oil immersion lens) can distinguish between objects that are closer together than those with lower NAs. This is vital for observing minute structures within cells and tissues.
Oil immersion lenses utilize oil with a high refractive index to increase NA, maximizing resolution. Understanding NA is key to selecting the appropriate objective for a specific observation, ensuring optimal image clarity and detail;
Microscope Maintenance and Care
Regular cleaning of lenses is vital, alongside proper storage to prevent damage. Careful handling ensures longevity and optimal performance of all microscope components.
Cleaning the Lenses
Maintaining clear lenses is paramount for optimal microscope function. Dust and debris significantly impact image quality, necessitating regular cleaning. Always begin with a blower to remove loose particles, avoiding abrasive materials that can scratch the delicate glass surfaces.
Use lens paper specifically designed for microscopes, moistened with lens cleaning solution – never use household cleaners! Gently wipe in a circular motion, starting from the center and moving outwards. For oil immersion objectives (like the 100x), a dedicated lens cleaner is essential to remove the oil residue completely.
Inspect lenses frequently under bright light to identify any remaining smudges or imperfections. Proper cleaning extends the lifespan of your microscope and ensures consistently sharp, detailed observations. Avoid excessive pressure during cleaning, and store lenses covered when not in use.
Proper Storage
Correct storage significantly extends the life of your microscope and maintains its functionality. After use, always cover the microscope with a dust cover to protect the lenses and other sensitive components from airborne particles and accidental damage.
Store the microscope in a dry, stable environment, away from direct sunlight, extreme temperatures, and humidity. Avoid locations prone to vibrations or impacts. When transporting the microscope, use the original packaging or a suitable protective case to prevent damage to the optical system.
Ensure all electrical connections are properly secured before storage. Regularly check the storage area for pests or signs of corrosion. Following these guidelines ensures your microscope remains a reliable tool for years to come, delivering consistent and accurate results.