
EG4 12kPV Installation Manual: A Comprehensive Guide
This manual details the EG4 12kPV hybrid inverter installation‚ configuration‚ and troubleshooting. It covers pre-installation checks‚ wiring‚ system setup‚ and advanced features for seamless integration.

The EG4 12kPV hybrid inverter represents a robust solution for both new and existing solar energy systems. Designed for 48V applications‚ it seamlessly integrates with various panel configurations‚ offering flexibility in installation – evidenced by successful setups with 25 x 415W panels at 2500 elevation.
This inverter excels in off-grid‚ grid-tie‚ and grid-zero applications‚ and notably supports AC coupled solar integration via its generator port‚ maintaining power to essential loads during outages. The EG4 12kPV boasts a user-friendly interface accessible through the EG4 Electronics Monitor System‚ facilitating remote updates and detailed system monitoring.
However‚ potential buyers should be aware that direct support comes from distributors like Signature Solar or Current Connected‚ not EG4 directly‚ relying on their warranty and RMA processes.
Understanding the 12kPV Hybrid Inverter Features
The EG4 12kPV inverter’s hybrid functionality allows for versatile operation‚ seamlessly switching between solar‚ battery‚ and grid power. A key feature is its AC coupling capability‚ particularly when connected to the generator port‚ enabling continued power delivery to loads even during grid failures‚ supplemented by solar production.
Remote monitoring and control are facilitated through the EG4 Electronics Monitor System‚ including firmware updates performed via a straightforward process – selecting the inverter and initiating a ‘Standard Update’. The system provides detailed status information and a comprehensive alarm/fault menu with associated troubleshooting steps‚ eliminating ambiguous error codes.
Furthermore‚ installer/customer codes offer potential tracking and security features; The inclusion of an abbreviations glossary ensures clarity‚ avoiding confusing technical jargon.
EG4 12kPV Models: 120-208VAC & 120-240VAC
The EG4 12kPV inverter is available in two voltage configurations to accommodate diverse electrical systems: 120-208VAC and 120-240VAC. This flexibility ensures compatibility with a wider range of installations across North America and other regions. Selecting the correct model is crucial for optimal performance and safety‚ aligning with local grid standards and panel specifications.
Both models support a 48V system and are designed for integration with solar panel arrays‚ with a demonstrated capability of handling up to 25 x 415W panels (Voc 37.41‚ Imp 12.5A) in a typical residential setup. Considerations for panel placement include roof pitch – examples given are 2/12 (10 degrees) and 1/12 (5 degrees) – and elevation (around 2500ft).
Regardless of the voltage chosen‚ the core hybrid inverter features remain consistent‚ offering grid-tie‚ off-grid‚ and battery charging/discharging capabilities.
Pre-Installation Considerations
Careful planning is essential before installation. Assess site conditions‚ confirm electrical system compatibility‚ and gather necessary tools and materials for a successful setup.
Site Assessment and Panel Compatibility
Before commencing installation‚ a thorough site assessment is crucial. Evaluate the roof’s structural integrity and pitch – examples include a 2/12 (10-degree) pitch or 1/12 (5-degree) slope. Consider the location’s elevation‚ as it impacts panel performance; an example is approximately 2500 feet.
Panel compatibility is paramount. The EG4 12kPV inverter functions effectively with various panel configurations‚ such as 25 x 415W panels. Verify the panels’ Voc (37.41V in one instance) and Imp (12.5A) align with the inverter’s specifications. Ensure sufficient space is available‚ with 15 panels potentially fitting on one roof section and 10 on an awning. Proper assessment guarantees optimal system efficiency and longevity.
Electrical System Requirements
The EG4 12kPV inverter operates with 48V systems and supports both 120-208VAC and 120-240VAC configurations. A dedicated circuit breaker‚ sized appropriately for the inverter’s output‚ is essential. Ensure the existing electrical panel has sufficient capacity to accommodate the added load from the solar array and inverter.
Proper wiring is critical. AC and DC disconnect switches are mandatory for safety and maintenance. The system must adhere to all local electrical codes and regulations. Compatibility with AC-coupled solar integration via the generator port requires careful consideration of grid-tie requirements. Qualified personnel should perform all electrical connections to guarantee a safe and compliant installation.
Tools and Materials Needed for Installation
For a successful EG4 12kPV installation‚ gather essential tools: wire strippers‚ crimpers‚ a multimeter‚ screwdrivers (various sizes)‚ a torque wrench‚ and appropriate safety gear (gloves‚ eye protection). Materials include appropriately sized wiring (AC and DC)‚ conduit‚ connectors‚ grounding wire‚ and mounting hardware.
Specific to the solar array: ensure you have the correct panel connectors and mounting brackets for your roof pitch (e.g.‚ 2/12 or 1/12). A communication cable (likely Ethernet) is needed for remote updates and monitoring via the EG4 Electronics Monitor System. Don’t forget labels for clear circuit identification. Having a spare fuse or breaker on hand is also recommended.

Installation Process
Proper mounting‚ AC/DC wiring‚ and grounding are crucial steps. Carefully follow the EG4 12kPV manual for secure installation and optimal system performance.
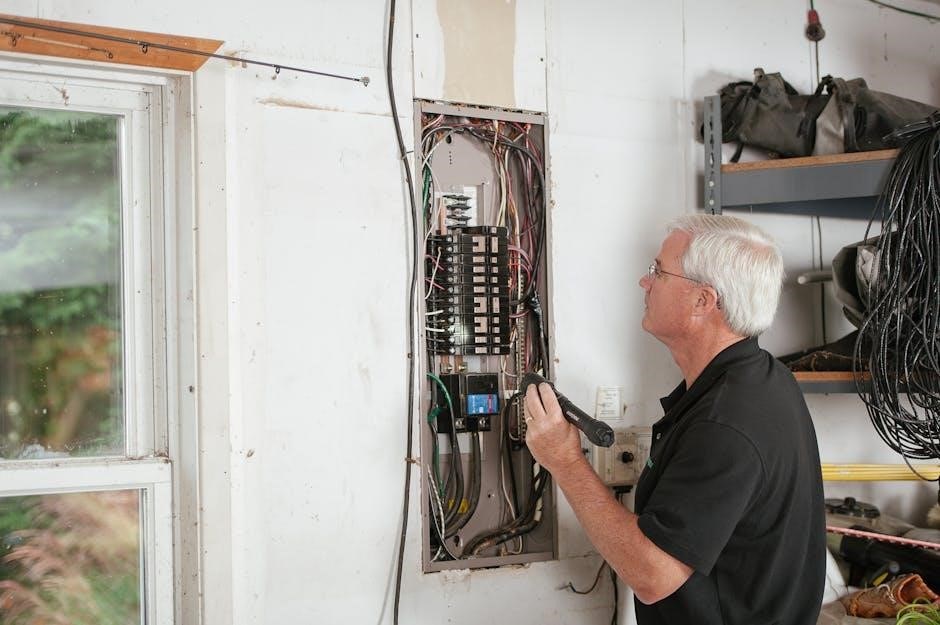
Mounting the EG4 12kPV Inverter
Securely mounting the EG4 12kPV inverter is paramount for safe and reliable operation. Choose a location that is well-ventilated‚ protected from direct sunlight and moisture‚ and easily accessible for maintenance. Ensure the mounting surface is structurally sound and capable of supporting the inverter’s weight – the unit is substantial!
Utilize appropriate mounting hardware‚ adhering to the manufacturer’s specifications. Maintain adequate clearance around the inverter for airflow‚ typically several inches on all sides. Verify the mounting is level to prevent internal stress and ensure proper operation. Double-check all fasteners are tightened to the specified torque.
Consider the proximity to both the DC disconnect (from the solar panels) and the AC disconnect (to the grid/load panel) to minimize wiring distances. A clean‚ organized installation will simplify future troubleshooting and maintenance.

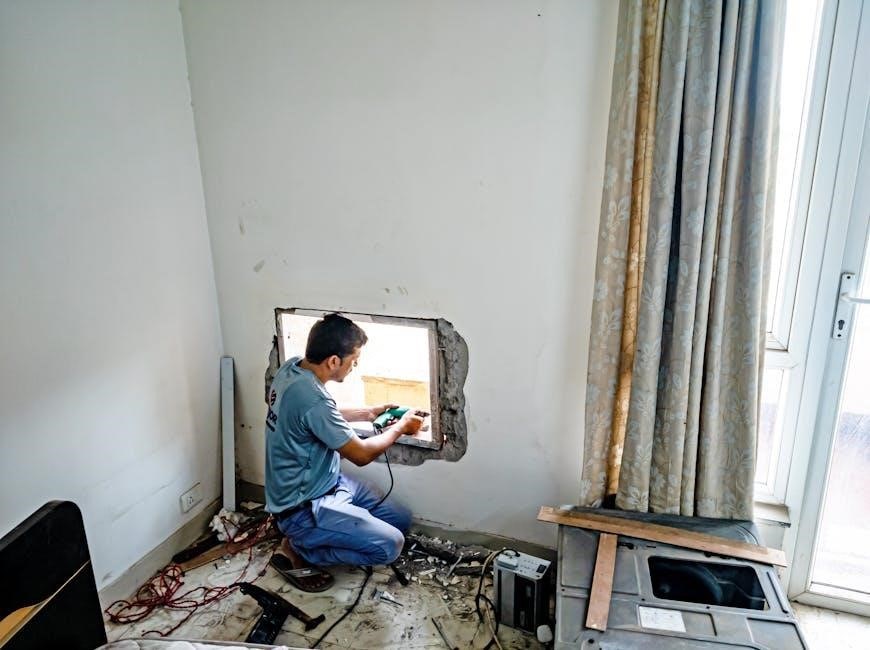
AC and DC Wiring Connections
Proper AC and DC wiring is critical for the EG4 12kPV’s performance and safety. Begin by ensuring the AC and DC disconnects are installed and readily accessible. For DC connections‚ use appropriately sized‚ sunlight-resistant wiring‚ following all local electrical codes. Polarity must be strictly observed to prevent damage to the inverter.
AC wiring should also adhere to local codes‚ utilizing the correct gauge wire for the breaker size. A dedicated circuit is recommended. Ensure all connections are tight and secure‚ utilizing appropriate torque specifications. Double-check wiring before energizing the system.
Pay close attention to grounding requirements for both AC and DC sides. Incorrect wiring can lead to system failure‚ fire hazard‚ or void the warranty. Consult a qualified electrician if you are unsure about any aspect of the wiring process.
Grounding Procedures

Effective grounding is paramount for safety and optimal EG4 12kPV operation. The inverter chassis must be grounded to a dedicated grounding electrode system‚ adhering to all national and local electrical codes. Use appropriately sized grounding conductors – typically‚ a minimum of 10 AWG copper wire is recommended‚ but verify local regulations.
Both the AC and DC sides require separate grounding connections. Ensure the DC grounding connection is made as close as possible to the array combiner box. For AC grounding‚ connect to the grounding terminal within the AC disconnect enclosure.
Verify the integrity of all grounding connections with a continuity test. Improper grounding can lead to electrical shock hazards and compromise the inverter’s protective functions. A qualified electrician should perform and verify all grounding procedures.

System Configuration & Setup
Configure the EG4 12kPV through the EG4 Electronics Monitor System‚ enabling remote updates and detailed system monitoring for optimal performance and control;
Logging into the EG4 Electronics Monitor System
Accessing the EG4 Electronics Monitor System is crucial for configuration and updates. Begin by ensuring a stable network connection for the inverter. Navigate to the designated web address provided by your distributor – typically Signature Solar or Current Connected.
You will be prompted to enter login credentials. These are usually established during the initial distributor setup process. If you are a first-time user‚ contact your distributor to obtain the necessary username and password.
Once logged in‚ the system dashboard will display an overview of your EG4 12kPV inverter’s status. Familiarize yourself with the interface‚ as this is where you’ll initiate firmware updates‚ monitor performance metrics‚ and access advanced settings. Successful login is the first step towards unlocking the full potential of your EG4 system.
Remote Update Procedure (Firmware)
Keeping your EG4 12kPV inverter’s firmware up-to-date is vital for optimal performance and stability. The remote update process is managed through the EG4 Electronics Monitor System. After logging in‚ navigate to the ‘Maintenance’ section‚ then select ‘Remote Update’.
The system will display a list of available updates. Carefully choose the correct firmware version for your specific 12kPV model (120-208VAC or 120-240VAC). Initiate the ‘Standard Update’ process.
The Monitor Center will then begin uploading and installing the firmware files directly to the inverter. Do not interrupt this process! The latest firmware version number will be visible in the bottom right corner of the screen‚ confirming a successful update. This ensures your system benefits from the newest features and bug fixes.
Selecting the Inverter for Update
Within the EG4 Electronics Monitor System‚ after initiating the Remote Update procedure‚ a crucial step involves accurately selecting the target inverter for the firmware update. If you have multiple EG4 inverters connected to the monitoring platform‚ a list will be presented.
Carefully identify your specific 12kPV inverter from the list. Pay close attention to the inverter’s serial number or any custom labels you may have applied during installation to avoid updating the wrong device.
Once the correct inverter is highlighted‚ confirm your selection before proceeding. Incorrectly selecting an inverter could lead to firmware incompatibility and potential system malfunctions. Double-checking this step is paramount for a smooth and successful update process.
Standard Update Process & Firmware Verification
After selecting the inverter‚ choose “Standard Update” within the EG4 Electronics Monitor System. The Monitor Center will then commence the firmware update‚ transferring both necessary files to the designated 12kPV inverter. It is critical not to interrupt this process – power cycling or disconnecting the inverter during the update can cause irreversible damage.
The system displays the latest firmware version in the bottom right window‚ providing real-time progress. Once completed‚ the inverter will automatically reboot.
Post-reboot‚ verify the successful update by navigating to the “Status” menu on the inverter’s LCD screen. Confirm that the displayed firmware version matches the version number indicated in the Monitor Center. This confirms a successful installation.

Menu Navigation & Understanding
The EG4 12kPV inverter’s LCD interface offers access to Status‚ Settings‚ and Alarm/Fault menus. Familiarity with these sections is crucial for effective system monitoring and control.
EG4 18kPV Main Menu Overview
The EG4 18kPV’s main menu‚ accessible via the LCD interface (Version 13)‚ provides the central hub for system operation. From the ‘Home’ screen‚ users can navigate to four primary sections: ‘Status’‚ ‘Settings’‚ ‘Alarm/Fault’‚ and return to ‘Home’.
The ‘Status’ menu delivers real-time performance data‚ including AC and DC power readings‚ battery voltage‚ and load consumption. ‘Settings’ allows for customization of inverter parameters‚ such as charging profiles and grid settings. The ‘Alarm/Fault’ menu displays any active error codes and provides troubleshooting guidance.
Understanding this menu structure is fundamental to effectively monitoring and managing the EG4 18kPV inverter. The intuitive layout‚ based on the provided menu map‚ ensures ease of use for both installers and end-users. Remember information is subject to change without notice;
Navigating the Status Menu
The Status menu offers a comprehensive overview of the EG4 inverter’s real-time operational parameters. Upon entering‚ users are presented with key performance indicators‚ providing immediate insight into system health. These include AC input/output power‚ DC input voltage and current from the solar array‚ and battery state of charge.
Further exploration reveals detailed data on load consumption‚ inverter temperature‚ and overall energy production. Monitoring these values allows for proactive identification of potential issues and optimization of system performance. The display clearly presents current readings‚ enabling quick assessment of the inverter’s functionality.
Regularly checking the Status menu is crucial for maintaining optimal system efficiency and ensuring long-term reliability. It’s the first point of call for understanding the inverter’s current operating condition.
Understanding the Settings Menu
The Settings menu provides access to configurable parameters that tailor the EG4 inverter to specific system requirements and user preferences. Within this menu‚ users can adjust settings related to battery charging‚ grid interaction‚ and output voltage. Careful consideration should be given to each setting before modification.
Key options include configuring the charging current and voltage for connected batteries‚ selecting the appropriate grid frequency and voltage‚ and defining the inverter’s response to grid disturbances. Advanced settings allow for customization of parameters like DC input voltage range and temperature compensation.
It is crucial to understand the implications of each setting before making changes. Incorrect configurations can impact system performance or safety. Refer to the EG4 documentation for detailed explanations of each parameter.
Alarm/Fault Menu Interpretation
The Alarm/Fault menu is critical for diagnosing system issues with the EG4 inverter; This section displays active and historical error codes‚ providing valuable insights into potential problems. Each code corresponds to a specific fault condition‚ ranging from overvoltage or undervoltage to communication errors or temperature warnings.
Crucially‚ the manual now includes associated troubleshooting steps for every fault code‚ simplifying the diagnostic process. Understanding the meaning of each code is essential for effective troubleshooting. The menu details the nature of the fault‚ its severity‚ and recommended corrective actions.
Regularly reviewing this menu can help prevent minor issues from escalating into major problems. Promptly addressing alarms and faults ensures optimal system performance and longevity. Refer to the comprehensive troubleshooting guide within this manual for detailed resolution procedures.
Troubleshooting & Error Codes
This section provides a detailed guide to decoding EG4 inverter fault codes and resolving common issues‚ including communication errors‚ for optimal system operation.
Decoding EG4 Inverter Fault Codes
Understanding the error codes generated by your EG4 12kPV inverter is crucial for efficient troubleshooting. Each code signifies a specific issue within the system‚ ranging from communication failures to overvoltage or undervoltage conditions. This manual provides a comprehensive list of these codes‚ paired with detailed explanations of their causes and recommended solutions.
For example‚ a communication error might indicate a loose connection or incompatibility with the EG4 Electronics Monitor System. Conversely‚ an overvoltage fault could stem from excessive DC input from the solar panels‚ requiring adjustments to the panel configuration or inverter settings. Importantly‚ every fault code now has associated troubleshooting steps‚ eliminating guesswork and streamlining the repair process. Refer to the complete fault code list within this section for a precise diagnosis and resolution.
Troubleshooting Common Issues
This section addresses frequently encountered problems with the EG4 12kPV inverter‚ offering practical solutions for quick resolution. Common issues include difficulty connecting to the EG4 Electronics Monitor System‚ unexpected shutdowns‚ and reduced power output. Begin by verifying all wiring connections‚ ensuring they are secure and correctly polarized.
If the inverter fails to communicate‚ check the network settings and confirm compatibility with your monitoring system. For shutdown events‚ examine the alarm/fault menu for specific error codes‚ referencing the ‘Decoding EG4 Inverter Fault Codes’ section. Reduced power output often indicates shading on the solar panels or suboptimal panel orientation. Regularly inspect panels for debris and ensure proper alignment. Remember to consult the warranty information if issues persist‚ as direct support is provided by the distributor.
Addressing Communication Errors
Communication errors between the EG4 12kPV inverter and the EG4 Electronics Monitor System can hinder performance monitoring and remote updates. Initial troubleshooting involves verifying the network connection – ensure the inverter is connected to a stable Wi-Fi network with sufficient signal strength.
Check the IP address configuration within the inverter’s settings menu‚ confirming it doesn’t conflict with other devices on the network. If problems persist‚ attempt a reboot of both the inverter and your network router. Confirm compatibility between the inverter’s firmware and the monitoring system’s software. Utilize the remote update feature to install the latest firmware‚ potentially resolving communication protocols. If issues remain‚ contact your distributor for specialized support‚ as EG4 does not provide direct assistance.

Advanced Features & Integration
The EG4 12kPV supports AC coupled solar via the generator port‚ installer/customer codes‚ and offers seamless integration into existing energy systems.
AC Coupled Solar Integration (Generator Port)
The EG4 12kPV inverter offers flexible AC coupled solar integration utilizing the dedicated generator port. This allows for the connection of existing grid-tied inverters‚ expanding overall system capacity and resilience. Interestingly‚ the system functions even without AC coupling to the generator port.
Connecting AC coupled solar to the generator port provides valuable production statistics within the EG4 Electronics Monitor System. More importantly‚ during grid outages‚ this configuration enables a portion of the home’s load to remain powered‚ with the solar array supplementing the inverter’s output. This creates a microgrid-like functionality‚ enhancing energy independence.
A practical example involves a setup with 25 x 415W panels (Voc 37.41‚ Imp 12.5A) feeding into the EG4 12kPV. Panel placement can vary based on roof pitch – 15 panels on a 2/12 (10-degree) pitch and 10 on a 1/12 (5-degree) slope‚ at approximately 2500 elevation.
Installer/Customer Code Functionality
The EG4 12kPV inverter incorporates installer and customer codes‚ providing a layer of system control and potential tracking capabilities. This feature allows installers to potentially lock or manage specific inverter settings post-installation‚ ensuring configuration integrity and service control.
The implementation of these codes suggests a mechanism for authorized access and modification of system parameters. While the exact functionality isn’t fully detailed‚ it hints at the possibility of remote diagnostics‚ firmware updates‚ or performance monitoring managed by the installing technician.
However‚ it’s crucial to note that direct support for EG4 inverters is not provided by EG4 themselves. Users rely on the warranty and support processes established by their distributors – such as Signature Solar or Current Connected – for assistance and RMA requests. This code functionality may be tied to distributor support models.
Warranty and Support Information (Distributor Reliance)
A critical aspect of EG4 12kPV ownership is understanding the support structure. Unlike many manufacturers‚ EG4 does not offer direct support to end-users. Instead‚ all warranty claims‚ technical assistance‚ and Return Merchandise Authorizations (RMAs) are handled exclusively through authorized distributors.
This means customers must rely on companies like Signature Solar or Current Connected for any issues encountered with their inverter. The warranty terms and conditions are therefore dictated by the distributor‚ not EG4 directly. It’s essential to thoroughly review the distributor’s warranty policy before purchase.
Potential buyers should confirm the distributor’s responsiveness and support capabilities. While EG4 provides the product‚ the post-sale experience is entirely dependent on the chosen distributor’s service quality and commitment to customer satisfaction.
Abbreviations Glossary (WTF Avoidance)
To ensure clarity and minimize confusion‚ this glossary defines common abbreviations used throughout this manual and within the EG4 12kPV system. Avoiding ambiguous terminology is crucial for successful installation and troubleshooting.
Voc – Open Circuit Voltage‚ the maximum voltage a panel can produce without a load. Imp – Impeller Current‚ the current at maximum power point. VAC – Volts Alternating Current‚ standard electrical voltage. kW – Kilowatt‚ a unit of power. kWh – Kilowatt-hour‚ a unit of energy.
This list isn’t exhaustive‚ but addresses frequently used terms. The EG4 system interface also employs specific codes for fault indications‚ detailed in the Troubleshooting section. By understanding these abbreviations‚ installers and users can more effectively interpret system data and diagnose potential issues‚ eliminating unnecessary frustration.